
AIRCRAFT WINDOWS… AND PORK
I was raised in the Midwest where we didn’t let a lot go to waste. When I was a small boy, my grandfather butchered hogs and “used everything but the oink.” Some of the parts I wasn’t so sure of, and he told me that they were all part of the hog and it was all “pork.” I’ll bet you’re wondering how I’m going to bring this subject around to aircraft windows, aren’t you?
The windows on an aircraft are just as much a part of the aircraft fuselage as the aircraft structure. It’s all “aircraft.” We can’t differentiate the aluminum stringers, ribs and aircraft skin from the plastic windows. They are all part of the aircraft and are regulated by FAA’s acceptable methods, techniques and practices. I’ve never understood why mechanics and pilots have been so conscientious about the way they maintain an aircraft per manufacturer’s instructions and the AC43.13, but have totally ignored the book when it comes time for maintaining the windows and interior upholstery. For this article, I will stick to the subject of windows and leave the interior upholstery for another time.
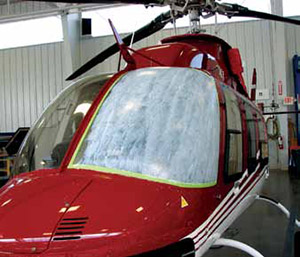
I work at a helicopter repair station and unfortunately, we replace a lot of aircraft windows as part of our service. Ninety percent of the windows that we have to replace are the results of neglect, improper maintenance or unintentional damage by the crews. Only about 10 percent of our window replacements are due to birdstrikes or other operational causes. My experience is almost entirely in helicopters with plastic windows, so I will focus this article in the area that I have most of my knowledge.
Regulations
Let’s get the regulations and the legalities out of the way so that we can get to the “meat” of this subject (I’m sorry for the pun). To start the research for this article, I went to my tech library to look for guidance in maintaining aircraft windows. We have more than 20 different model aircraft on our repair station Opspec, so I had many manufactures’ manuals to resource. Nearly all of them had detailed instructions for the cleaning, inspecting and repair of their windows and windscreens. The ones that didn’t have specific instructions referenced their standard practices manual.
I picked up my copy of the AC43.13-1B/2B, the Aircraft Inspection, Repair and Alterations Manual — Acceptable Methods, Techniques and Practices that we all reference when it comes to a fuselage repair, and in chapter three there were two whole sections that deal with transparent plastics and windshields, enclosures and windows. There are cleaning and polishing instructions, inspection criteria and repair procedures. If there is so much regulated technical data on the subject of aircraft windows, why then do we continue to destroy these “plastic aircraft parts” through sheer ignorance? Old habits are hard to break.
Glass vs. Plastic
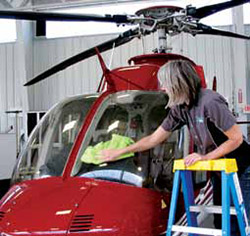
We’ve all been wiping off the windshields of our cars for as long as we can remember. We all know how to do it and we all know how clean we like our windshields. We just can’t accept the fact that our aircraft windshield or windows are not made of tempered glass like our cars. I’m as guilty as anyone. If I don’t take the time to think about what I am doing, I will climb up on the ladder and start cleaning a windshield like I do my truck, and that is just wrong. We have to first break this habit if we are going to reduce the destruction of our “plastic aircraft parts.” I figure that if I keep saying this, it will sink in.
Now that we know we aren’t dealing with tempered glass and we know we are dealing with aircraft parts, there are some rules by which we have to abide:
• Never rub or touch a dirty window. No “CLEAN ME” drawn in the dust
• Never polish a dirty window
• Always flush the window surface with clean running water
• Use a little mild dishwashing detergent and your bare hand to clean the dust and dirt off your dirty windows before you polish.
• Never use your aircraft scrub brush to clean your windows.
• Always soak the bugs on your windshield to soften them up before wiping them off. Never scrape the bugs off.
• Never use paper towels to clean or polish windows.
• Always use a clean, soft cotton cloth to clean and polish your plastic windows.(Believe it or not, baby diapers work great.)
• Never, ever use gasoline, alcohol, benzene, acetone, carbon tetrachloride, fire extinguisher or deicing fluids, lacquer thinners or glass window cleaning sprays to clean your windows. (Most glass cleaners contain ammonia.) Never use ammonia on acrylic plastics.
• Always use products that are recommended for use on acrylic plastic and especially products designed for aviation use. (No furniture polish, as it is designed for interior use.)

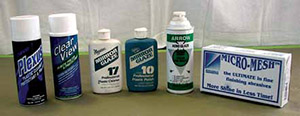
If running water and your bare hand isn’t practical for cleaning your dirty windows, there are many types of cleaners and polishes on the market that are effective and safe when used correctly. There are essentially three catagories of products for acrylic plastic care:
1. Non-abrasive liquid foam sprays (in pumps or aerosols) that may not have scratch-filling properties.
2. Non-abrasive creams that have scratch-filling properties.
3. Mildly-abrasive creams that have scratch-removing properties.
All of these have a time and place in the life of your acrylic plastic windows. You might want to use the foaming cleaner to clean your windows after your aircraft has been sitting in a dusty hangar and you don’t have any running water available. The foaming action is designed to lift most of the dirt off the surface of the plastic and with a soft cotton cloth, you can wipe it off. The first time through, just wipe up the foam to remove the dirt. Don’t rub it in! The second pass, you can clean. Remember to use up-and-down strokes on the windscreens (the direction of airflow over the windshield) and horizontal strokes on the side windows (also in the direction of airflow.) Never use circular motions, as this can cause “halos” in your field of vision.
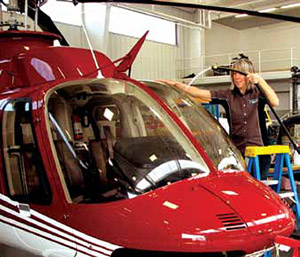
Once you have clean windows, you want to put on a good non-abrasive cream polish that can fill minute scratches and polishes out to a fine wax film that protects the plastic and inhibits bugs from sticking to the surface. Use a good cleaner and polish that is anti-static so the dirt will not be attracted to the surface. If you have small scratches that you can still see after polishing, you may need to use the mildly-abrasive creams that have scratch-removing properties. You need to be a little aggressive with these, but not too aggressive. With abrasive rubbing compounds, you can apply them in a circular motion as you are trying to rub out the visible scratches. After you have satisfactorily removed the scratches, you should go back over them with a non-abrasive scratch filler to protect the new surface.
If you practice this kind of preventive maintenance on your acrylic plastic windows, they should last you a long time and you should be able to identify the airport on the first pass the next time.
Another area to be careful about is putting sharp objects (kneeboards, headsets, etc.) up on the glareshield and scratching the plastic. Windshield wipers have been included on many helicopters, but I really haven’t found any that work and don’t just do more damage than good. Most operators ban the use of the wipers and with a good coat of polish, the rain doesn’t stick anyway.
Natural Causes and Old Age
Depending on how the aircraft has been maintained, tiny cracks caused by the material relieving stress can result in crazing below the surface of the plastic. Windows can also haze up with age, partly due to the depletion of the plasticizers in the material and a chemical reaction to ultraviolet light. Keeping an aircraft in a hangar is the best protection from the weather and the sun. Unfortunately, there are also numerous ways to damage plastic windows while trying to protect them. Canopy covers can help as long as they are soft and installed correctly. The windows should be clean before installing the covers, and they should be put on tightly enough to prevent abrasion in the wind. Dirt will be blown up under the covers by the wind, but the damage will be minimal as long as the covers can’t move around.
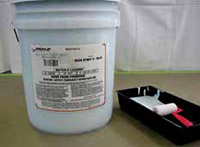
When we bring an aircraft into the hangar for major work we thoroughly clean the windows, inspect for serviceability and completely coat the surface with a product called Sign Strip II Mask. This product is manufactured by Spraylat Corp. and is used for sign masking. It can be applied to any surface, including acrylic plastic, and adheres to the surface to protect it from dust much better than masking tape and paper can. When maintenance is completed, the mask is simply peeled off and the windows are cleaned properly. It is much like the plastic film that comes on new windows from the manufacturer.
What do we do when we run across windows that are just too scratched up to polish out with normal abrasive polishes? We have a choice of either replacing them or repairing them. Most OEMs will give you repair limitations in their manuals. A repair must go as deep as the deepest scratches, so depending on this dimension, there may not be enough material left to deem a window serviceable. It may be more cost effective to just replace the windows when they are too far gone. This can still be very costly. We try to give our customers the option to replace or repair whenever we can.
The truth is, the only way to remove a scratch from clear acrylic plastic is to remove material from around the scratch until the scratch disappears. You must then polish this new surface progressively back to clear. This is not easy and it will require all of the patience and elbow grease that you can muster. There are a number of good products on the market for this purpose and they follow the same theory. They start by using a relatively coarse grade of sandpaper (600 grit) to remove the material around a scratch down to the scratch depth and then progressively using finer and finer papers (1,500, 2,000, 3,000 grit, etc.) until the surface is ready for a rubbing compound and finally a fine polish.
You don’t want to start with too coarse a sandpaper for the depth of the scratch, but when using the correct paper, don’t be afraid to remove enough material to remove the scratch. Don’t concentrate the work in too small of an area which will result in a distorted view. It’s best to follow the instructions in the kit and then practice on a piece of scrap acrylic to decide if you are up for the challenge. It can be a rewarding experience when done correctly, and can possibly save you thousands of dollars.
Whether you’ve just put out thousands of dollars replacing or a hundred hours repairing, you should at least have a healthy respect for your windows by now. Regular maintenance on your windows will allow you to see better and prolong the life of your plastic aircraft parts. Remember, your windows are part of the aircraft fuselage and should be treated as such.
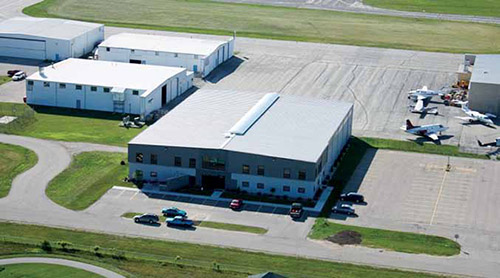
 Terry L. Peed has been in Aviation for 43 years and is a licensed A&P and IA. He is the chief inspector for Helicopter Specialties Inc., a certificated FAA repair station that performs heavy helicopter maintenance, completions with painting capabilities and avionics installations.